Penny Perks
Penny Perks are a boost used in Penny's Pursuit. With each Perk having its effect, it can drastically change the player's experience when playing a level.
On a level, up to three Perks can be used. The player can choose one Perk for free, but additional Perks will cost gems to use in the level (with 5 gems cost for each perk.)
Perks can be leveled-up by completing bonus objectives. The Perks themselves and the levels of each Perk reset whenever a new event rolls in.
The more time you upgrade perks, the more bonus objectives it needs to upgrade a perk. In some events, mostly worldly events, some perks can require 1, 2, or 3 bonus objectives completed before being upgraded.
List of perks
Note: The stats below only apply to level 1.
| Perk | Icon | Description |
|---|---|---|
| Traffic Jam Perk | 
|
Delays zombies by 1.5 seconds! |
| Score Boost Perk | 
|
Increases score by 5.0 percent! |
| Sun Break Perk | 
|
Gives bursts of 150 sun at regular intervals! |
| Zom-b-gone Perk | 
|
Replaces Zombie Gargantuars/Roman Zcorpions/Prospector Zombies in level! |
| Boss Buster Perk | 
|
Inflicts up to 1250 damage to bosses every 30 seconds! |
| Butter Zombies Perk | 
|
Applies Butter for 5 seconds every 30 seconds! |
| Chill Zombies Perk |
|
Applies Chill for 5 seconds every 30 seconds! |
| Freeze Zombies Perk | 
|
Applies Freeze for 5 seconds every 30 seconds! |
| Poison Zombies Perk | 
|
Applies 100 Poison damage for 3 seconds every 45 seconds! |
| Hypnotize Zombies Perk | 
|
3 Zombies Hypnotize every 30 seconds! |
| Stall Zombies Perk | 
|
Applies Stall for 3 seconds every 25 seconds! |
| Sun Bean Zombies Perk | 
|
Applies Sun Bean for 5 seconds every 25 seconds! |
| Shrink Zombies Perk | 
|
Shrink 3 Zombies every 30 seconds! |
| Plant Food Zombies Perk | 
|
1 Zombies carry extra Plant Food every 30 seconds! |
| Mine Launcher Perk | 
|
Disperse 1 Potato Mines/Primal Potato Mines every 25 seconds! |
| Jalapeño Popper Perk | 
|
Disperse 1 Jalapeños every 25 seconds! |
| Tumble Rumble Perk | 
|
Disperse 1 Tumbleweeds every 25 seconds! |
| Minion Maker Perk | 
|
Disperse 1 Hypnoshrooms every 30 seconds! |
| Squish Squash Perk | 
|
Disperse 1 Squash every 30 seconds! |
| Boost Tile Perk | 
|
Disperse 1 single-use Boost Tiles every 30 seconds! |
| Triple Boost Tile Perk |
|
Disperse 1 three-use Boost Tile every 45 seconds! |
| Bass Blast Perk | 
|
Knockback zombies approx. 0.56 tiles every 30 seconds! |
| Sun Bank Perk | 
|
Start with 100 additional Sun. |
| Penny Shield Perk | 
|
Creates a 4500 health shield every 45 seconds! |
| Penny Multi shield Perk |
|
Creates two 1500 health shields every 30 seconds! |
| Quick Delivery Perk | 
|
Conveyor belt speed increased 15%! |
| Anti-Gravity Perk | 
|
1 Zombies float away every 20 seconds! |
| Cherry Picker Perk | 
|
Adds Cherry Bombs to the conveyor! |
| Instant Gargantuar Perk |
|
Adds Boosted Hypno-shrooms to the conveyor! |
| Hurry Hurrikale Perk |
|
Adds Hurrikales to the conveyor! |
| Iced Out Perk |
|
Adds Iceblooms to the conveyor! |
| Power Puffed Perk |
|
Adds Puffballs to the conveyor! |
| Imp Possible Perk |
|
Adds Imppears to the conveyor! |
| Heavy Watering Perk | 
|
Seed packet refresh time reduced 5%! |
| Hyper Healing Perk | 
|
Heal plants 50%, up to 150% of max health every 15 seconds! |
| Birthdayz Party Perk | 
|
Birthdayz zombies join the party! |
| Rebound Peas Perk (China only) | 
|
All plants will rebound zombie peas for 30 seconds! |
Perk Upgrades
| Perk | Level Upgrades | |||||||||
|---|---|---|---|---|---|---|---|---|---|---|
| 1 | 2 | 3 | 4 | 5 | 6 | 7 | 8 | 9 | 10 | |
Traffic Jam |
1.5 seconds | 2.0 seconds | 2.5 seconds | 3.0 seconds | 3.5 seconds | 4.0 seconds | 4.5 seconds | 5.0 seconds | 5.5 seconds | 6.0 seconds |
Score Boost |
5.0% | 6.0% | 6.5% | 7.0% | 7.5% | 8.0% | 8.5% | 9.0% | 9.5% | 10.0% |
Sun Break |
150 sun burst | 200 sun burst | 250 sun burst | 300 sun burst | 350 sun burst | 400 sun burst | 450 sun burst | 650 sun burst | 700 sun burst | 750 sun burst |
Boss Buster |
1250 damage | 1750 damage | 2250 damage | 2750 damage | 3250 damage | 3750 damage | 4250 damage | 4500 damage | 4750 damage | 5000 damage |
| 30 seconds | 28 seconds | 26 seconds | 24 seconds | 22 seconds | 20 seconds | 18 seconds | 17 seconds | 16 seconds | 15 seconds | |
Butter Zombies |
5 seconds (butter) | 6 seconds (butter) | 6 seconds (butter) | 7 seconds (butter) | 8 seconds (butter) | 8 seconds (butter) | 9 seconds (butter) | 9 seconds (butter) | 10 seconds (butter) | |
| 30 seconds | 28 seconds | 26 seconds | 24 seconds | 24 seconds | 22 seconds | 22 seconds | 20 seconds | 20 seconds | ||
Chill Zombies |
5 seconds (chill) | 6 seconds (chill) | 6 seconds (chill) | 7 seconds (chill) | 8 seconds (chill) | 8 seconds (chill) | 9 seconds (chill) | 9 seconds (chill) | 10 seconds (chill) | |
| 30 seconds | 28 seconds | 26 seconds | 24 seconds | 24 seconds | 22 seconds | 22 seconds | 20 seconds | 20 seconds | ||
Freeze Zombies |
5 seconds (freeze) | 6 seconds (freeze) | 6 seconds (freeze) | 7 seconds (freeze) | 8 seconds (freeze) | 8 seconds (freeze) | 9 seconds (freeze) | 9 seconds (freeze) | 10 seconds (freeze) | |
| 30 seconds | 28 seconds | 26 seconds | 24 seconds | 24 seconds | 22 seconds | 22 seconds | 20 seconds | 20 seconds | ||
Poison Zombies |
100 poison damage | 100 poison damage | 100 poison damage | 100 poison damage | 100 poison damage | 100 poison damage | 100 poison damage | 100 poison damage | 100 poison damage | 100 poison damage |
| 3 seconds (poison) | 4 seconds (poison) | 5 seconds (poison) | 6 seconds (poison) | 7 seconds (poison) | 8 seconds (poison) | 9 seconds (poison) | 10 seconds (poison) | 11 seconds (poison) | 12 seconds (poison) | |
| 45 seconds | 40 seconds | 37 seconds | 34 seconds | 32 seconds | 30 seconds | 28 seconds | 27 seconds | 26 seconds | 25 seconds | |
Hypnotize Zombies |
3 Zombies | 3 Zombies | 4 Zombies | 4 Zombies | 5 Zombies | 6 Zombies | 7 Zombies | |||
| 30 seconds | 28 seconds | 26 seconds | 24 seconds | 24 seconds | 22 seconds | 20 seconds | ||||
Stall Zombies |
3 seconds (stall) | 3 seconds (stall) | 4 seconds (stall) | 4 seconds (stall) | 5 seconds (stall) | 5 seconds (stall) | 6 seconds (stall) | 6 seconds (stall) | 7 seconds (stall) | 7 seconds (stall) |
| 25 seconds | 24 seconds | 23 seconds | 22 seconds | 21 seconds | 20 seconds | 19 seconds | 18 seconds | 17 seconds | 16 seconds | |
Sun Bean Zombies |
5 seconds (effect) | 6 seconds (effect) | 6 seconds (effect) | 7 seconds (effect) | 7 seconds (effect) | 8 seconds (effect) | 8 seconds (effect) | 9 seconds (effect) | 9 seconds (effect) | 10 seconds (effect) |
| 25 seconds | 24 seconds | 23 seconds | 22 seconds | 21 seconds | 20 seconds | 19 seconds | 18 seconds | 17 seconds | 16 seconds | |
Shrink Zombies |
3 Zombies | 4 Zombies | 5 Zombies | 6 Zombies | 7 Zombies | 8 Zombies | 9 Zombies | 10 Zombies | 11 Zombies | 12 Zombies |
| 30 seconds | 28 seconds | 26 seconds | 24 seconds | 24 seconds | 24 seconds | 22 seconds | 22 seconds | 20 seconds | 20 seconds | |
Plant Food Zombies |
1 Zombie | 1 Zombie | 1 Zombie | 1 Zombie | 2 Zombies | 2 Zombies | 3 Zombies | 3 Zombies | ||
| 30 seconds | 28 seconds | 26 seconds | 24 seconds | 24 seconds | 22 seconds | 22 seconds | 20 seconds | |||
Mine Launcher |
1 Mine | 1 Mine | 2 Mines | 2 Mines | 2 Mines | 2 Mines | 3 Mines | 3 Mines | 3 Mines | 3 Mines |
| 25 seconds | 23 seconds | 22 seconds | 21 seconds | 20 seconds | 19 seconds | 18 seconds | 17 seconds | 16 seconds | 15 seconds | |
Jalapeño Popper |
1 Jalapeño | 1 Jalapeño | 2 Jalapeños | 2 Jalapeños | 2 Jalapeños | 2 Jalapeños | 3 Jalapeños | 3 Jalapeños | 3 Jalapeños | 3 Jalapeños |
| 25 seconds | 23 seconds | 22 seconds | 21 seconds | 20 seconds | 19 seconds | 18 seconds | 17 seconds | 16 seconds | 15 seconds | |
Tumble Rumble |
1 Tumbleweed | 1 Tumbleweed | 1 Tumbleweed | 2 Tumbleweeds | 2 Tumbleweeds | 2 Tumbleweeds | 2 Tumbleweeds | 3 Tumbleweeds | 3 Tumbleweeds | 3 Tumbleweeds |
| 25 seconds | 23 seconds | 21 seconds | 21 seconds | 20 seconds | 19 seconds | 18 seconds | 18 seconds | 17 seconds | 15 seconds | |
Minion Maker |
1 Hypno-shroom | 1 Hypno-shroom | 2 Hypno-shrooms | 2 Hypno-shrooms | 2 Hypno-shrooms | 3 Hypno-shrooms | 3 Hypno-shrooms | 3 Hypno-shrooms | 3 Hypno-shrooms | |
| 30 seconds | 29 seconds | 28 seconds | 27 seconds | 26 seconds | 26 seconds | 25 seconds | 23 seconds | 20 seconds | ||
Squish Squash |
1 Squash | 1 Squash | 1 Squash | 1 Squash | 2 Squash | 2 Squash | 2 Squash | 3 Squash | 3 Squash | 3 Squash |
| 30 seconds | 28 seconds | 27 seconds | 26 seconds | 25 seconds | 24 seconds | 23 seconds | 22 seconds | 21 seconds | 20 seconds | |
Boost Tile |
30 seconds | 28 seconds | 27 seconds | 26 seconds | 25 seconds | 24 seconds | 23 seconds | 22 seconds | 21 seconds | 20 seconds |
Triple Boost Tile |
45 seconds | 40 seconds | 37 seconds | 34 seconds | 32 seconds | 30 seconds | 28 seconds | 27 seconds | 26 seconds | 25 seconds |
Bass Blast |
0.56 tiles | 0.68 tiles | 0.79 tiles | 0.90 tiles | 1.01 tiles | 1.12 tiles | 1.24 tiles | 1.35 tiles | 1.46 tiles | 1.58 tiles |
| 30 seconds | 28 seconds | 26 seconds | 24 seconds | 24 seconds | 24 seconds | 22 seconds | 22 seconds | 20 seconds | 20 seconds | |
Sun Bank |
100 sun | 150 sun | 200 sun | 250 sun | 300 sun | 350 sun | 400 sun | 450 sun | 500 sun | 550 sun |
Penny Shield |
4500 health | 4500 health | 5000 health | 5500 health | 6000 health | 6500 health | 7000 health | 7500 health | 8000 health | 8500 health |
| 45 seconds | 40 seconds | 37 seconds | 34 seconds | 32 seconds | 30 seconds | 28 seconds | 27 seconds | 26 seconds | 25 seconds | |
Penny Multi shield |
2 shields | 2 shields | 2 shields | 3 shields | 3 shields | 3 shields | 4 shields | 4 shields | 4 shields | 5 shields |
| 1500 health | 1600 health | 1700 health | 1700 health | 1800 health | 1800 health | 1900 health | 1900 health | 2000 health | 2000 health | |
| 35 seconds | 33 seconds | 31 seconds | 29 seconds | 27 seconds | 25 seconds | 23 seconds | 22 seconds | 21 seconds | 20 seconds | |
Quick Delivery |
15% speed | 20% speed | 25% speed | 30% speed | 35% speed | 40% speed | 45% speed | 50% speed | 55% speed | 60% speed |
Anti Gravity |
1 Zombie | 1 Zombie | 1 Zombie | 2 Zombies | 2 Zombies | 2 Zombies | 3 Zombies | 3 Zombies | 3 Zombies | 3 Zombies |
| 20 seconds | 18 seconds | 17 seconds | 16 seconds | 15 seconds | 14 seconds | 13 seconds | 12 seconds | 11 seconds | 10 seconds | |
Cherry Picker |
25 seconds | 22 seconds | 20 seconds | 18 seconds | 16 seconds | 14 seconds | 13 seconds | 12 seconds | 11 seconds | 10 seconds |
Instant Gargantuar |
30 seconds | 28 seconds | 27 seconds | 26 seconds | 25 seconds | 24 seconds | 23 seconds | 22 seconds | 21 seconds | 20 seconds |
Hurry Hurrikale |
25 seconds | 23 seconds | 22 seconds | 21 seconds | 20 seconds | 19 seconds | 18 seconds | 17 seconds | 16 seconds | 15 seconds |
Iced Out |
25 seconds | 22 seconds | 20 seconds | 18 seconds | 16 seconds | 14 seconds | 13 seconds | 12 seconds | 11 seconds | 10 seconds |
Power Puffed | ||||||||||
Imp Possible |
30 seconds | 28 seconds | 27 seconds | 26 seconds | 25 seconds | 24 seconds | 23 seconds | 22 seconds | 21 seconds | 20 seconds |
Heavy Watering |
5% cooldown reduction | 10% cooldown reduction | 15% cooldown reduction | 20% cooldown reduction | 25% cooldown reduction | 30% cooldown reduction | 35% cooldown reduction | 40% cooldown reduction | 45% cooldown reduction | 50% cooldown reduction |
Hyper Healing |
50% heal | 60% heal | 65% heal | 70% heal | 75% heal | 80% heal | 85% heal | 90% heal | 95% heal | 100% heal |
| 150% max | 165% max | 180% max | 190% max | 200% max | 209% max | 220% max | 230% max | 240% max | 250% max | |
| 15 seconds | 14 seconds | 13 seconds | 13 seconds | 12 seconds | 12 seconds | 11 seconds | 11 seconds | 11 seconds | 10 seconds | |
Rebound Peas Perk (China only) |
||||||||||
* Zom-b-gone perk and Birthdayz Party perk have no upgrades.
Strategies
Penny Perks are helpful when playing Spicy and Extra Hot levels as they give you an extra advantage. Perks can help you achieve Perk Upgrades or avoid losing levels. Here is how you can use each perk to win levels:
Traffic Jam Perk
Advantages: Reduces zombie speed, making anything that moves easier to handle.
Disadvantage: None.
Score Boost Perk
Advantages: Increases score which can help you achieve Perk Upgrades.
Disadvantage: Only useful in Arena/score levels and does nothing beyond completing bonus upgrades. Usually can'y win the stage for you.
Sun Break Perk
Advantages: Gives a decent amount of sun to plant plants and is very useful in Last Stand levels, because this can be your only way to earn sun in a level. This Perk gives more sun in total that that of Sun Bank Perk.
Disadvantage: Sometimes unable to keep up with the player's strategies, as it might not provide enough sun for more expensive plants such as Winter Melon, Mega Gatling Pea and Banana Launcher.
Zom-b-Gone Perk
Advantages: Downgrades Zcorpions and Gargantuars which are often the biggest threats in each stage.
Disadvantages: Replaces them with Imp Cannons which still can be dangerous, especially in Spicy or Extra Hot levels. Can inadvertedly make the stage harder when it comes to Prospector Zombie.
Boss Buster Perk
Advantages: Depletes Zomboss' health during the boss fight which is useful, especially when you are struggling or having low-level plants. It also works on Zombie Generals like Cardio, Z-Mech, and Caesar, if any of these appear.
Disadvantages: Doesn't target other zombies.
Chill Zombie Perk
Advantages: Slow down zombies which makes it easier for you to plant and makes the plants' time required to be eaten by zombies longer. Also helps in completing "Chill X Zombies" bonus objectives.
Disadvantages: Zombies are chilled for only a limited time and is useless when you have any fire-based plants on the lawn because they will remove the chill effect from the zombies.
Poison Zombie Perk
Advantages: Can easily kill certain tough zombies in Mild levels. Also helps in completing "Poison X Zombies" bonus objectives.
Disadvantages: Useless when a Healer Zombie is present, as he can remove poison effects from the zombies. Also, zombies are dramatically stronger at higher difficulties while poison damage isn't increased.
Hypnotize Zombie Perk
Advantages: Can hypnotize powerful zombies strong zombies regardless of health such as Gargantuars, and even zombies that are normally impossible to hypnotize (such as Zcorpions) which can easily wipe out zombie hordes. Also helps in completing "Hypnotize X Zombies" bonus objectives.
Disadvantages: Can inadvertedly target weak zombies. Countered by Healer and Medusa.
Stall Zombies Perk
Advantages: Stalls zombies, giving you more time to kill them or further prepare your defenses. Also helps in completing "Stall X Zombies" bonus objectives.
Disadvantages: Stalls for a very limited time (upgrading it is recommended, as it increases the frequency and duration), useless when consistend alternatives like Shadow Peashooter or Pokra are in play.
Sun Bean Zombie Perk
Advantages: Very helpful in Last Stand or in produce at least X sun levels, more zombies mean more sun.
Disadvantages: Will only be in effect for a limited time, and zombies will always drop 50 sun regardless of health. It can also be difficult to obtain the sun from zombies in higher difficulties due to higher health, meaning that you might not be actually get any sun from it (upgrading it is recommended, as it effectively improves your odds of getting sun). These zombies are also not counted if the player is doing "Sun Bean X Zombies".
Shrink Zombie Perk
Advantages: Shrinks zombies which reduces their health and damage. Also helps in completing "Shrink X Zombies" bonus objectives.
Disadvantages: Healer Zombies are immune to it and zombies are shrunk for a limited time before going back to normal size (upgrading it is recommended, as it increases its duration and hence the amount of damage dealt).
Butter Zombie Perk
Advantages: Butters all zombies similar to the Freeze Zombie perk and defeats Seagull Zombies, Pelican Zombies, and Bug Zombies (only the bug will be defeated, and the Zombie will be dropped). Also helps in completing "Butter X Zombies" bonus objectives.
Disadvantages: Useless against Jester Zombies and Parasol Zombies because they block or deflect the butter.
Freeze Zombie Perk
Advantages: Freezes all zombies including flying zombies, which can give you time to set up plants. Also helps in completing "Freeze X Zombies" bonus objectives.
Disadvantages: Useless if you have fire-based plants because they will remove the freeze effect from the zombies, and they are frozen for a very limited time (upgrading it is recommended, as it increases the time).
Plant Food Zombie Perk
Advantages: Really helpful in levels where Plant Food is scarce, or levels that need constant use of Plant Food (for example, the Blover + Reinforce-mint strategy)
Disadvantages: The plant food may be given to stronger zombies such as Zcorpions, Gargantuars or even Bosses, making it difficult to acquire.
Mine Launcher Perk
Advantages: Can easily deal heavy damage, especially when Primal Potato Mines are in play.
Disadvantages: The mines spawned are unarmed. Avoid using it in don't lose X plants because once they explode they will count as a lost plant, and will cause Gargantuars to throw Imps which can cause a problem, especially in Spicy and Extra Hot levels.
Squish Squash Perk
Advantages: Can easily handle zombies without them trespassing his tile or dodging attacks. Also helps in completing "defeat X General Zombies" bonus objectives if Plant Fed.
Disadvantages: The Squashes are always spawned in column 9 and sometimes miss the targets from the left side, which means the player will need to use safe plants such as Spikeweed or Cactus to make those Squashes reaching them. Avoid using it in "Don't lose more than X plants" objectives because once they squash zombies, they will disappear and count as a lost plant (more Squash upgrades are recommended as they will squash more), in addition of causing Garagntuars to throw their Imps, especially in Spicy or Extra Hot levels.
Jalapeño Popper Perk
Advantages: Can easily destroy a lane of zombies.
Disadvantages: May cause Gargantuars to throw their Imps causing trouble, especially in Spicy and Extra Hot levels. The Jalapenos are often spawned randomly (often 1-3 on 5 tiles in column 9), potentially missing dangerous zombies. Counts against "Don't lose more than X Plants" and "Don't Have More than X Plants" objectives. Blocks plants in its respective tile.
Boost Tile Perk/Triple Boost Tile Perk
Advantages: Really helpful in levels where Plant Food is scarce, or levels that need constant use of them (for example, the Blover + Reinforce-mint strategy)
Disadvantages: Useless when you bring already Boosted plants from Zen Garden.
Bass Blast Perk
Advantages: Can push back zombies that prevent plants from being eaten and zombies trampling flowers. The pushed zombies are counted airborne and vulnerable to Blover.
Disadvantages: Can remove stunning effects from zombies when they are pushed pack.
Sun Bank Perk
Advantages: You will have more sun to plant in Last Stand levels, and have a head-start in regular levels for planting.
Disadvantages: Can be a waste of Perks if it is not upgraded, as the extra sun supplied may not be enough sun for expensive plants such as Winter Melon or Banana Launcher. Gives less sun in total than that of Sun Break Perk.
Penny Shield Perk/Penny's Multi Shield
Advantages: Protects your plants and your house with a shield having the same function as Infi-nut's. The shields are independent, meaning that losing the shield in a lane does not affect others. Multiple shields can stall zombies from a further distance, giving the player more time to prepare defenses.
Disadvantages: May slow zombies down when you are leading to certain plants such as Primal Potato Mine or Chili Bean (this is usually not the case, though). Shields are insufficient against zombies of higher levels.
Quick Delivery Perk
Advantages: Plants come more often on the Conveyor Belt which can make all the difference in battle.
Disadvantages: Stacking unneeded plants making the player unable to get important seed packets.
Anti-Gravity Perk
Advantages: Can flick away dangerous or high-health zombies, with the only exceptions of Gargantuars, Cardio Zombies, Z-Mechs and Zombots. Dangerous zombies are often priortized, and even then you should be able to focus on other dangerous threats.
Disadvantages: Can inadvertedly target weak zombies,
Conveyor Plant-type Perks
Advantages: Conveyor belt perks such as Cherry Picker, Instant Gargantuar, and Hurry Hurrikale provide a similar concept: providing a useful instant plant in the conveyor belt, which can help decimate large crowds of zombies, weaken stronger zombies, or knock back dangerous or close zombies. The plant can also be manually placed by the player, unlike the Jalapeño Popper perk. It is highly recommended to upgrade these types of perks to make them appear more often on the conveyor belt.
Disadvantages: For the Instant Gargantuar perk, the Hypno-Shroom may not be eaten by zombies if it is destroyed or thrown off the lawn, resulting in no Gargantuars. The Gargantuar itself is also very vulnerable to large hordes of zombies which can overwhelm it. Using it when a Healer or Medusa is nearby is also not advised due to their abilities to turn the Gargantuar into stone or a regular one respectively, which gives the zombies a major advantage and potentially result in a loss. For the Cherry Picker Perk, sometimes in Extra Hot difficulty, zombies require two explosions to be defeated.
Heavy Watering Perk
Advantages: Reduces the refresh time of plants, allowing you to plant them more often.
Disadvantages: None.
Birthdayz Party Perk
Advantages: Replaces all Basic Zombies and their helmet variants to Birthdayz Zombies, which can potentially make a level easier by removing the zombies' helmets.
Disadvantages: Doesn't target anything that isn't a Basic Zombie variant.
Hyper Healing Perk
Advantages: Heals plants, which if upgraded can make a wall be able to stall a single zombie forever, depending on difficulty. Chard Guard will regain a leaf when this perk occurs, making it like a spring bean that can knockback multiple zombies at once.
Disadvantages: Plants meant to be eaten such as Chili Bean will also be healed, which means the a zombie eating a plant supposed to be eaten will have to do so longer, giving zombies such as Octo Zombie more time to toss something onto it or destroy it altogether.
Gallery

Perk Library (new)

Perk Library (old)
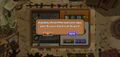
A warning about using the Mine Launcher Perk

Sun Bean Zombie Perk in action (Animated)

Bass Blast Perk in Action(Animated, note: The Shield Zombie shield get disabled)

Shield Zombie Perk in action (Animated)

Mine Launcher Perk in action (Animated)

Plant Food Zombie Perk in action (Animated)

Sun Beak perk in action (Animated)
Poison Zombies Perk in action (Animated)

Penny Perks sprites

Penny Perks Plants vs. Zombies 2 (Chinese version) sprites


.gif)


Trivia
- Bass Blast Perk was reused by Hair Metal Gargantuar guitar shockwave.
- The amount of perk upgrades you can get varies depending on the event, such as:
- In Rome, Rome on the Range, Vidi Vici BRAINZ! & Iron Age Antics, there are 109 perk upgrades
- In Plants vs. Romans, there are 108 perk upgrades
- In Imperial Entanglements, there are 105 perk upgrades