Ancient Egypt - Day 11
- For the old Chinese version of the level, see Ancient Egypt - Day 11 (Chinese version: pre-1.8).
- For the current Chinese version of the level, see Ancient Egypt - Day 11 (Chinese version).

Ancient Egypt - Day 11 is the eleventh level of Ancient Egypt in Plants vs. Zombies 2. It is a Locked and Loaded level. This is the first Locked and Loaded level of Ancient Egypt, as well as the intended first of the game. To complete this level, the player must survive the zombie attack with the given plants. When this level is finished for the first time, the player will receive an Ancient Egypt piñata.
Dialogue
(Penny appears)
Penny: This level is a locked coordinate in time.
Penny: You must take these plants to win.
Penny: Otherwise you risk distorting reality.
Crazy Dave: Never distort reality! You'll pull something.
(Crazy Dave and Penny leave)
Difficulty
Since this is a Locked and Loaded level, the player cannot choose their own plants. However, the plants chosen are quite useful. For one, two sun producers are given, one of which the player has not unlocked yet, being Twin Sunflower. This makes sun production a non-issue.
On the other hand, while the offensive plants given are not very powerful, the zombies aren't either. Additionally, Potato Mine can take out the tough zombies like Buckethead Mummy. Wall-nut is also given, which blocks the zombies.
Tombstones are not much of a concern, as there are only four of them, far out in the lawn, and since Tomb Raiser Zombie is not present, no more can spawn.
Waves
- The small number next to the zombie icon means that zombie will always appear in that lane, with 1 being the topmost lane and 5 being the bottommost lane.
| Waves | Non-dynamic zombies | Ambush zombies | Note(s) |
|---|---|---|---|
| 1 | None | ||
| 2 | None | ||
| 3 | None | ||
| 4 | None | ||
| 5 | None | ||
| 6 | None | ||
| 7 | None | ||
| 8 | None | First flag. Carries 1x Plant Food. | |
| 9 | None | ||
| 10 | None | Final wave. |
Strategies
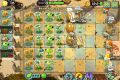
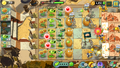
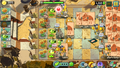
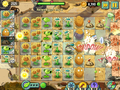
Gallery
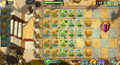
First time reward

By Pinkgirl234

Level completed by Pinkgirl234
On the first flag by Mognoxprox
Final wave by Mognoxprox
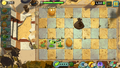
Completed by Mognoxprox
By Someone456


_-_1.png)
_-_2.png)


Trivia
- This is the first Locked and Loaded level in the game. However, the player can still play other Locked and Loaded levels before this one if he or she obtains the Pirate Seas key and uses it to unlock Pirate Seas.
- In the 8.9.1 update, Twin Sunflower was replaced with Grave Buster.
- In the 9.5.1 update, waves 11-16 were removed and the first flag was moved to wave 10.
Walkthrough
- Plants vs. Zombies 2 Level UP Iceberg Lettuce Ancient Egypt Day 11 (Ep.12)
By Alex5432000
- Ancient Egypt Day 11 - Walkthrough
- *: Removed ~: Epic Quest
<poll> How would you rate Ancient Egypt - Day 11's difficulty? Very hard Hard Somewhat hard Medium Somewhat easy Easy Very easy </poll>