Big Wave Beach - Day 9
- For the Chinese version of the level, see Big Wave Beach - Day 9 (Chinese version).
- For the Chinese version of this level before the v1.8 update, see Big Wave Beach - Day 9 (Chinese version: pre-1.8).
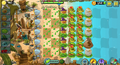
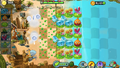
Big Wave Beach - Day 9 is the ninth level of Big Wave Beach in Plants vs. Zombies 2. Dave's mold colonies are present in the two leftmost columns in this level. The tideline is located between the second and third column. After completing this level, the player receives a money bag.
Difficulty
- Dave's mold colonies covers all plantable squares, forcing players to use Lily Pad as the tide owns the rest. This also makes all plants on the frontline vulnerable to Imp Mermaid Zombie attacks.
- This level is a more difficult version of Big Wave Beach - Day 7, which had no shore available, but the whole lawn was usable. With 10 less spaces in Day 9, you have less options and are closer to the zombies.
- This level is also difficult due to zombies entering the lawn in hordes early on in the level. Two zombies enter into the lawn at the start of the level, instead of the usual amount of one, making early instants somewhat useful, examples being Potato Mine and Squash.
Waves
- The small number next to the zombie icon means that zombie will always appear in that lane, with 1 being the topmost lane and 5 being the bottommost lane.
| Waves | Non-dynamic zombies | Ambush zombies | Tide level | Note(s) |
|---|---|---|---|---|
| 1 | None | 7
|
||
| 2 | None | 7
|
||
| 3 | None | 7
|
Carries 1x Plant Food. | |
| 4 | None | 7
|
First flag. | |
| 5 | None | 7
|
||
| 6 | None | 7
|
||
| 7 | None | 7
|
Carries 1x Plant Food. | |
| 8 | None | 6
|
Second flag. | |
| 9 | None | 6
|
||
| 10 | None | 6
|
||
| 11 | 0
|
Carries 1x Plant Food. Low Tide! | ||
| 12 | None | 0
|
Third flag. | |
| 13 | None | 2
|
||
| 14 | None | 4
|
||
| 15 | None | 6
|
Carries 1x Plant Food. | |
| 16 | None | 6
|
Final wave. |
Strategies
===Strategy 1 (May contain gem premium content)
=
- Required plants:
- Twin Sunflower
- Lily Pad
- Tangle Kelp
- Cherry Bomb
- Ghost Pepper (if you have bought it)
- Wall-nut
- Tall-nut
- Collect sun and place Twin Sunflowers on the leftmost plantable column.
- Place Tangle Kelp in the column nearest to the Twin Sunflowers. This allows the player to delay time, overcoming the Tangle Kelp's slow recharge so it can be used to kill both the first two zombies and also to collect more sun.
- Start placing a Wall-nut or Tall-nut in each row near the Twin Sunflowers such a way that every row has some form of defense.
- Use Tangle Kelp, Ghost Pepper and Cherry Bomb as deemed fit, reserving Cherry Bombs as a last resort. Preferably, Tangle Kelp should be used on lone zombies or to clear out zombies that were not killed by Ghost Pepper while Ghost Pepper and Cherry Bombs should be used to clear out crowds of zombies or if strong zombies are present.
- Continue building up the defense as the Wall-nuts and Tall-nuts get eaten. Eventually, it would be easy to have a column of Wall-nuts and Tall-nuts adjacent to the Twin Sunflowers. This will prevent the ambushes resulting in devastating damage. With constant replacing of eaten Wall-nuts and Tall-nuts, this level should be a breeze from here.
===Strategy 2 (May contain premium content) (May contain gem premium content)
=
- Required plants:
- Twin Sunflower
- Lily Pad
- Tangle Kelp
- Jalapeno (if you have bought it)
- Cherry Bomb
- Homing Thistle (if you have bought it)
- Snapdragon
- Sweet Potato (if you have bought it or you have the eighth slot)
- Place Twin Sunflower on the third column.
- Use tangle kelp on the first zombie comes until the end of first flag or Homing Thistles if you had enough sun.
- Place Snapdragons on the fourth column, to attack Pompadour Zombies and Bikini Zombies variant and for the Imp Mermaid.
- Until the second, third, fourth flag, use the same technique, if a plant (e.g. Snapdragon) was eaten, use Jalapeno or Cherry Bomb or the Sweet Potato to change their lanes, then bang it up with a Jalapeno. When the final wave comes, and with your loaded weapons (Cherry Bomb or/and Jalapeno), use them as the Sweet Potato, then put Sweet Potato in the middle if the zombie on the first lane and the fifth lane were dead, then, use a plant food on a Snapdragon and bang them all.
- This strategy is only used for the ones who bought Jalapeno, Homing Thistle, Sweet Potato and the eighth slot.
Strategy 3 (Contains gemium content)
- Created by VeXJL
- Required plants:
- Procedure
- Place Gold Bloom on a Lily Pad. Dig up the Lily Pad furthest away from the house, for extra sun if you have the shovel upgrade.
- Start placing Twin Sunflower. This will produce sun for the Winter Melons. Only place them on the first, third, and fifth row, on the first and second columns.
- Place Sweet Potato on the second row, fifth column to lure the top zombie to it. Use Tangle Kelp to get rid of the other zombie.
- When you have enough sun, place Winter Melon to kill off the zombies in the second row. Place a Lily Pad and a Sweet Potato on the fourth row, fifth column, across from the other Sweet Potato.
- Keep planting Twin Sunflower and make sure you have at least two winter melons on the second and fourth row behind the Sweet Potato. Use Gold Bloom and Lily Pad when necessary.
- Once you get four Winter Melons, plant Magnet-shrooms on the fifth column between the Sweet Potatoes.
- Refresh Sweet Potato with Wall-nut First Aid or by using Plant Food. This will make sure the zombies do not attack the first, third, and fifth rows where there is nothing defending.
Strategy 4
- Created by Chainut
- Required plants:
1. Plant 2 more Lily Pad and 3 Moonflowers at the fifth and sixth column from left (count Mold Colonies column too).
2. Plant Tangle Kelp and Chili Bean at the almost leftmost column to kill first 2 zombies to get more sun from Moonflowers.
3. Try to plant some Primal Peashooter at the 2 leftmost column and you must plant some Primal Wall-nut on the eighth column from left (count Mold Colonies column too).
4. Try to fill all column by the plant that I have just mentioned each column.
5. Cherry Bomb, Tangle Kelp and Chili Bean should be used in an emergency case.
6. If zombies come too much, You can plant a column of Primal Peashooter in a column between Moonflower and Primal Wall-nut.
Gallery
First time reward
By BLACK OUT
By SOMEGUY476
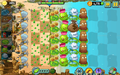
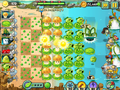
Lots of Snorkel Zombies by SOMEGUY476
By VeXJL
By Someone456


Walkthrough
- Big Wave Beach Day 9
- Plants vs. Zombies 2 Don't plant on Dave's mold colonies - Big Wave Beach Day 9 (Ep.395)
By Alex5432000
- *: Removed ~: Epic Quest
<poll> How would you rate Big Wave Beach - Day 9's difficulty? Very hard Hard Somewhat hard Medium Somewhat easy Easy Very easy </poll>