Rescue the Gold Bloom

Rescue the Gold Bloom was the second Epic Quest of Plants vs. Zombies 2 that was released with the 4.6.1 update. This series of levels showcase Gold Bloom, and was obtainable as a reward when completed. It was unlocked after beating Ancient Egypt - Day 8.
It was officially removed as Gold Bloom became a premium plant, though the first eight steps original quest returned as a part of the "Plant of the Week" epic quest for Gold Bloom in the 6.3.1 update.
Step 1
Complete each step in the Epic Quest chain for an awesome reward!
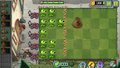
This level was an altered version of Modern Day - Day 21. This level included Jurassic Imps, Jurassic Bullies, and portals closer to the player's house in the final wave. The Ancient Egypt portal did not appear.
- The small number next to the zombie icon means that zombie will always appear in that lane, with 1 being the topmost lane and 5 being the bottommost lane.
| Waves | Non-dynamic zombies | Ambush zombies | Note(s) |
|---|---|---|---|
| 1 | None | ||
| 2 | None | Carries 1x Plant Food. | |
| 3 | None | ||
| 4 | None | First flag. | |
| 5 | None | ||
| 6 | None | Carries 1x Plant Food. | |
| 7 | None | ||
| 8 | None | Second flag. | |
| 9 | None | ||
| 10 | None | Carries 1x Plant Food. | |
| 11 | None | ||
| 12 | None | Final wave. |
Strategies
Strategy 1
- Created by VeXJL (Contains gemium content)
This strategy does not require premiums nor Plant Food, but does require Ghost Pepper. This also will not lose any lawn mowers.
- Required plants:


 (do not use if you do not plan on using Plant Food)
- Procedure
- Place a column of Twin Sunflowers.
- Place Celery Stalkers to deal with the first few zombies. Put them on column 5.
- Place Primal Wall-nuts on column 3 if you are waiting for Celery Stalker to recharge. Alternatively, you could use Ghost Pepper but you need defense for All-Star Zombies.
- If your Celery Stalker is about to be overwhelmed, put Magnifying Grass on column 2 and use it to deal with the extra zombies so the Celery Stalkers are not eaten.
- Use Blover on Balloon Zombie.
- Continue to use Magnifying Grass and Celery Stalker to deal with zombies until the last flag. Replace damaged Primal Wall-nuts if needed.
- At the last flag, portals will spawn and bounce a Magnifying Grass and Primal Wall-nut. For the lower portal, use Magnifying Grass to kill the Octo Zombie and the first Surfer Zombie. For the upper portal, place and use Magnifying Grass to kill the spawned zombies before they could do damage. Do not forget to use Magnifying Grass in the second to fourth row. When the second Surfer Zombie appears, use Ghost Pepper to kill it.
- Stall the last few zombies with Primal Wall-nut and kill them with Ghost Pepper and Celery Stalker.
Magnifying Grass strategy
- Required plants:
- Sun-shroom
- Magnifying Grass (obviously)
- Infi-nut (better if boosted)
- Iceberg Lettuce
- Potato Mine or Primal Potato Mine
- Wall-nut (if you have the 7th seed slot)
- Plant Sun-shrooms on 3rd, 4th, and 5th columns.
- Use Potato Mine on the first zombie.
- Use Iceburg Lettuce to stall zombies.
- After the first zombie is defeated, you should have 1 or 2 columns of Sun-shrooms by now.
- Plant Magnifying Grass on first column.
- Plant Wall-nuts/Infi-nuts on 7th column.
- When the 2 portals appear, quickly shoot when zombies appear out of the portals.
Gallery

First step in Rescue the Gold Bloom, using the first strategy above.
- Plants vs. Zombies 2 - Epic Quest Rescure the Gold Bloom! - Stage 1

Step 2
Get your first glimpse of the glorious Gold Bloom!
This level was an altered version of Neon Mixtape Tour - Day 10 which was changed from Special Delivery to a regular level. Sun did not fall from the sky, but Gold Bloom was introduced and pre-selected in this level. This level included Excavator Zombies and Parasol Zombies on the same lanes. MC Zom-B also was not included in this level.
- The small number next to the zombie icon means that zombie will always appear in that lane, with 1 being the topmost lane and 5 being the bottommost lane.
| Waves | Non-dynamic zombies | Ambush zombies | Note(s) |
|---|---|---|---|
| 1 | None | ||
| 2 | None | Punk plays. | |
| 3 | None | ||
| 4 | None | ||
| 5 | None | ||
| 6 | None | First flag. | |
| 7 | None | ||
| 8 | None | ||
| 9 | None | Rap plays. | |
| 10 | None | ||
| 11 | None | Punk plays. | |
| 12 | None | Final wave. |
Strategies
Strategy 1
- Created by VeXJL (Contains gemium content)
This strategy does not require premiums, but does require Ghost Pepper. This also will not lose any lawn mowers.
- Required plants:


 (pre-selected)
- Procedure
- Plant a column of Twin Sunflowers. Stall the first few zombies slowly with Stallia, so the punk jam will be delayed. Kill them with Ghost Pepper.
- Put two Magnet-shrooms in column 2. One in the second row and one in the fourth row.
- The rest of the level is pretty straightforward:
- Kill with Guacodiles and Ghost Peppers.
- If any zombies are too close for your liking, use Thyme Warp or Stallia on them.
Gallery

Second step in Rescue the Gold Bloom, using the first strategy above.
- Plants vs. Zombies 2 - Epic Quest Rescure the Gold Bloom! - Stage 2

Step 3
Hold the line against a formation of frosty foes!
This level was an altered version of Frostbite Caves - Day 13. This level included Tomb Raiser Zombies (That can appear in "Snowstorm!" ambushes) and Wizard Zombies.
- The small number next to the zombie icon means that zombie will always appear in that lane, with 1 being the topmost lane and 5 being the bottommost lane.
| Waves | Non-dynamic zombies | Ambush zombies | Freezing wind | Note(s) |
|---|---|---|---|---|
| 1 | None | None | ||
| 2 | None | None | Carries 1x Plant Food. | |
| 3 | None | None | ||
| 4 | None | None | First flag. Carries 1x Plant Food. | |
| 5 | None | Lanes: 3, 4 | Snowstorm! | |
| 6 | None | None | ||
| 7 | None | None | Snowstorm! | |
| 8 | None | Lanes: 1, 5 | Second flag. Carries 1x Plant Food. | |
| 9 | None | Snowstorm! | ||
| 10 | None | Lanes: 1, 5 | ||
| 11 | None | Carries 1x Plant Food. Snowstorm! | ||
| 12 | None | None | ||
| 13 | None | Carries 1x Plant Food. Snowstorm! | ||
| 14 | None | None | ||
| 15 | None | Snowstorm! | ||
| 16 | None | None | Final wave. |
Strategies
Strategy 1
- Created by VeXJL (Contains gemium content)
This strategy does not require premiums, but does require Ghost Pepper. This also will not lose any lawn mowers.
- Required plants:
- Procedure
- Plant a column of Twin Sunflowers.
- Use Ghost Pepper to destroy the first few zombies. Put it two tiles in front of the flowers for efficiency.
- Start placing Pepper-pults in column 2. This will thaw your Sunflower as well as block snowballs while killing weak zombies.
- When you first see a Blockhead Zombie, place Spring Bean under it and use Blover. This should kill it immediately.
- When you first see the Wizard Zombies, immediately use Cherry Bomb.
- Continue using Ghost Pepper and Guacodile to weaken Zombies for Pepper-pult to kill.
- When you see the Wizard Zombies a second time, make sure they are fully on the lawn. Use Plant Food on Spring Bean and use Blover while the Spring Bean is in the air.
- When you see the Wizard Zombies again, use another Plant Food on Spring Bean to kill them and some Tomb Raiser Zombies along with it.
- Continue using Ghost Pepper and Guacodile to weaken Zombies until the Final Flag.
- When you reach the Final Flag, make sure ALL zombies are on the field, including the Wizard Zombies. Once that happens, use Plant Food on the Spring Bean and use Blover to kill all of them effortlessly.
Gallery

Third step in Rescue the Gold Bloom, using the first strategy above.
- Plants vs. Zombies 2 - Epic Quest Rescure the Gold Bloom! - Stage 3

Step 4
Take a premium plant out for a spin and earn rewards while doing it!
This level was a premium plant quest that featured Jalapeno.
Strategies
Strategy 1
- Created by VeXJL (Contains gemium content)
Attention: This strategy may not work due to RNG.
This strategy does not require using Power-ups or Boosts.
- Procedure
- Use Repeater to take care hordes of Camel Zombies. Place three per row if you want to make that row safe.
- Use Jalepeno right before zombies trample the flowers, this makes sure that Flags do not come too early.
- Use Potato Mine on the tiles right in front of the flowers to defeat Buckethead Zombies and Poncho Zombies.
Gallery
Fourth step in Rescue the Gold Bloom, using the first strategy above.
- Plants vs. Zombies 2 - Epic Quest Rescure the Gold Bloom! - Stage 4

Step 5
Produce 3000 sun in the darkest age imaginable!
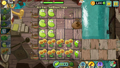
This level was an altered version of Dark Ages - Night 9 which is a Dark Alchemy level. This level had an objective to produce 3000 sun, and included Barrel Roller Zombies and Pirate Captain Zombies.
- The small number next to the zombie icon means that zombie will always appear in that lane, with 1 being the topmost lane and 5 being the bottommost lane.
| Waves | Non-dynamic zombies | Ambush zombies | Spawned Tombstones |
Note(s) |
|---|---|---|---|---|
| 1 | None | None | ||
| 2 | None | None | ||
| 3 | None | None | Carries 1x Plant Food. | |
| 4 | None | |||
| 5 | None | Necromancy! | ||
| 6 | None | None | ||
| 7 | None | None | Carries 1x Plant Food. | |
| 8 | None | First flag. | ||
| 9 | None | Necromancy! | ||
| 10 | None | None | ||
| 11 | None | Carries 1x Plant Food. | ||
| 12 | None | None | ||
| 13 | None | None | ||
| 14 | None | |||
| 15 | None | Carries 1x Plant Food. Necromancy! | ||
| 16 | None | None | Final wave. |
Strategies
Strategy 1
- Created by VeXJL (Contains gemium content)
This strategy does not require premiums nor Plant Food, but does require Ghost Pepper. This also will not lose any lawn mowers.
- Required plants:
- Optional plants:
- Procedure
- Plant two columns of Sun-shrooms. This should easily complete the extra objective as well as give sun to fund for Guacodiles and Ghost Peppers.
- Use Grave Buster to remove some tombstones.
- Use Ghost Peppers to kill off the first few zombies.
- Start planting Chard Guards to stall zombies and defend the Sun-shrooms.
- By the time you see a Conehead Zombie, consider using Guacodile to do extra damage.
- Repeat Steps 2 to 5 until the Final Flag.
- When you reach the Final Flag, you can using any instant plant to kill off many zombies. If you do not have one, use Ghost Pepper, Guacodile, and Chard Guard to survive.
Gallery

Fifth step in Rescue the Gold Bloom, using the first strategy above.
- Plants vs. Zombies 2 - Epic Quest Rescure the Gold Bloom! - Stage 5

Step 6
Use Gold Bloom in a mixed-up melee on the high seas!
This level was an altered version of Pirate Seas - Day 18 but was not a Locked and Loaded level. Instead, the player could choose seed packets and Gold Bloom was pre-selected. Wild West Gargantuars, Poncho Zombies and Balloon Zombies appeared in this level.
- The small number next to the zombie icon means that zombie will always appear in that lane, with 1 being the topmost lane and 5 being the bottommost lane.
| Waves | Non-dynamic zombies | Ambush zombies | Note(s) |
|---|---|---|---|
| 1 | None | ||
| 2 | None | ||
| 3 | None | Carries 1x Plant Food. | |
| 4 | None | ||
| 5 | None | ||
| 6 | None | Carries 1x Plant Food. | |
| 7 | None | ||
| 8 | None | First flag. Carries 1x Plant Food. | |
| 9 | None | ||
| 10 | None | ||
| 11 | None | Carries 1x Plant Food. | |
| 12 | None | ||
| 13 | None | Carries 1x Plant Food. | |
| 14 | None | ||
| 15 | None | Carries 1x Plant Food. | |
| 16 | None | Final wave. Carries 1x Plant Food. |
![]() + always carries metal grate
+ always carries metal grate
Strategies
Strategy 1
- Created by VeXJL (Contains gemium content)
This strategy does not require premiums, but does require Ghost Pepper. This also will not lose any lawn mowers.
- Required plants:

- (pre-selected)
- Procedure
- Start by using Twin Sunflower on rows 4 to 5 and columns 1 to 4. Use Gold Bloom to help you.
- Kill the first few zombies with Spring Bean. Plant the Spring Beans on column 5.
- Plant Laser Beans on rows 1 to 3 and columns 1 to 2. You should have adequate sun supply.
- Use Guacodile and Ghost Pepper to support the Spring Beans.
- When you see the Wild West Gargantuar coming or if your Spring Beans are very vulnerable, use Plant Food on Spring Bean and all the zombies will fall in the water.
- Use Blover immediately on sight of Balloon Zombies.
Strategy 2
- Required plants:


- (pre-selected)
- Steps
- Place Gold Bloom, follow with Primal Sunflowers in the leftmost columns.
- Use Primal Potato Mines on the first few zombies.
- While doing this, use Primal Peashooters on the rows without planks.
- After filling those rows sufficiently, start filling the rows with planks with Primal Peashooters.
- Dig up Primal Sunflowers and place Winter Melons. The top spots to first place them are the second and fourth row.
- Use Cherry Bombs in crowds or when Gargantuars spawn, Blovers where Swashbucklers or other flying zombies appear, and use Gold Bloom whenever possible. It is also recommended to use Plant Food Refresh on Gold Bloom to get more sun.
Gallery
Sixth step in Rescue the Gold Bloom, using the first strategy above.
- Plants vs. Zombies 2 - Epic Quest Rescure the Gold Bloom! - Stage 6

Step 7
Take a premium plant out for a spin and earn rewards while doing it!
This level was a premium plant quest that featured Starfruit.
Strategies
Strategy 1
- Created by VeXJL (Contains gemium content)
- Required plants:
- Procedure
- Plant Starfruit and Repeaters on columns 2 to 4 to get rid of Gravestones.
- Put Citrons at the very back to deal with Jetpack Zombies.
- If there is a Buckethead Zombie, immediately plant a Potato Mine to deal with it.
- Use Plant Food on Starfruit if there are too many Pharaoh Zombies or if there is a Gargantuar.
Gallery
Seventh step in Rescue the Gold Bloom, using the first strategy above.
- Plants vs. Zombies 2 - Epic Quest Rescure the Gold Bloom! - Stage 7

Step 8
Preserve the pretty flowers in the Lost City!
This level was an altered version of Lost City - Day 24. The objective was that zombies must not trample the flowers which was not altered in this quest. This level included Robo-Cone Zombies, Mecha-Football Zombies, and Disco-tron 3000s.
- The small number next to the zombie icon means that zombie will always appear in that lane, with 1 being the topmost lane and 5 being the bottommost lane.
| Waves | Non-dynamic zombies | Ambush zombies | Note(s) |
|---|---|---|---|
| 1 | None | ||
| 2 | None | Carries 1x Plant Food. | |
| 3 | None | ||
| 4 | Carries 1x Plant Food. Parachute Rain! | ||
| 5 | None | First flag. Carries 1x Plant Food. | |
| 6 | None | ||
| 7 | None | ||
| 8 | None | Carries 1x Plant Food. | |
| 9 | None | ||
| 10 | None | Final wave. |
Strategies
Strategy 1
- Created by VeXJL (Contains gemium content)
This strategy does not require premiums, but does require Ghost Pepper. This also will not lose any lawn mowers.
- Required plants:
- Procedure
- Plant Twin Sunflowers on the first column. These should give a steady supply of sun for Ghost Pepper, Guacodile, and Rotobaga.
- Kill the first few Zombies with Ghost Pepper or Guacodile.
- Kill any Adventurer Zombies and Bug Zombies on sight with Blover.
- When you see your first Robo-Cone Zombie, start planting Primal Wall-nuts on column 4, rows 2 and 4, and Rotobagas on column 3. Kill the Robo-Cone Zombie by planting a Spring Bean under it and immediately using Blover to kill it.
- Repeat steps 2 to 4 until you see a pair of Robo-Cone Zombies.
- Use Plant Food on the Spring Bean and while it is in the air, use Blover. This should remove the Robo-Cone Zombies from the lawn.
- When you reach the Final Flag, use Plant Food on Spring Bean again and use Blover. It should kill all the zombies and you win the Epic Quest Step 8.
Gallery

Eighth step in Rescue the Gold Bloom, using the first strategy above.
- Plants vs. Zombies 2 - Epic Quest Rescure the Gold Bloom! - Stage 8

Step 9
Take a premium plant out for a spin and earn rewards while doing it!
This level was a premium plant quest that featured Fire Peashooter.
Strategies
Strategy 1
- Created by VeXJL (Contains gemium content)
This strategy does not lose any lawn mowers.
- Procedure
- Use Fire Peashooter on columns 1 to 2 to kill zombies.
- Use Chard Guard on column 3 to stall zombies until you have Fire Peashooter.
- When you get Tile Turnip, place it on the Fire Peashooters that have Buckethead Zombies or Blockhead Zombies in its lane.
- Use Plant Food on the Fire Peashooters if there are too many Imps or if there are Buckethead Zombies or Blockhead Zombies in its lane.
- By the Final Flag, you should have Power Tiles on five Fire Peashooters in each row. Make sure all Zombies, including Imps, are fully on the lawn. Use Plant Food on a Fire Peashooter that is on a Power Tile to kill all the Zombies.
Gallery

Ninth step in Rescue the Gold Bloom, using the first strategy above.
- Plants vs. Zombies 2 - Epic Quest Rescure the Gold Bloom! - Stage 9

Step 10
Conquer a cornball collection of baddies to emancipate the Gold Bloom!
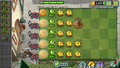
This level was an altered version of Jurassic Marsh - Day 29 but was not a Locked and Loaded level. The player could choose seed packets, while Gold Bloom was pre-selected. Chicken Wrangler Zombies, Weasel Hoarders, and Octo Zombies were included in this level.
- The small number next to the zombie icon means that zombie will always appear in that lane, with 1 being the topmost lane and 5 being the bottommost lane.
| Waves | Non-dynamic zombies | Ambush zombies | Dinosaurs | Note(s) |
|---|---|---|---|---|
| 1 | None | None | ||
| 2 | None | None | ||
| 3 | None | Carries 1x Plant Food. | ||
| 4 | None | First flag. | ||
| 5 | None | None | ||
| 6 | None | |||
| 7 | None | None | ||
| 8 | None | None | Second flag. | |
| 9 | None | |||
| 10 | None | |||
| 11 | None | None | ||
| 12 | None | None | Final wave. |
Strategies
Strategy 1
- Created by VeXJL (Contains gemium content)
This strategy does not require premiums, but does require Ghost Pepper. This also will not lose any lawn mowers.
- Required plants:
- (pre-selected)
- Procedure
- Plant a column of Twin Sunflowers on column 2. This will take a while, so use Gold Bloom and Ghost Pepper to help this process.
- Plant Ghost Peppers to kill the first few zombies.
- Use Blovers to get rid of zombies moved by the dinosaurs.
- Plant Laser Beans on column 1, prioritizing row 3 and 5 first, and row 4 second.
- When the T. Rex arrives, place a Primal Wall-nut in its row on column 3 then place a Ghost Pepper to kill them.
- When the first Octo Zombie arrives, kill it with Ghost Pepper as fast as possible.
- Check and replace damaged Primal Wall-nuts.
- When the second and third Octo Zombies arrive, use Plant Food on a Spring Bean and use Blover while the Spring Bean is in the air. This should kill all zombies and immediately skip to the Final Flag.
- Place a Primal Wall-nut on the last column and on row 4 to prevent the Pteradactyls from moving zombies.
- When you reach the final flag, immediately kill the Octo Zombie with a Ghost Pepper.
- Kill the rest of the Zombies, except for the Gargantuar, with Ghost Pepper.
- Killing the Gargantuar comes last. Place a Spring Bean directly under it and then immediately use Blover to instantly kill it.
Strategy 2
This strategy does not require premium plants and can beat the level without lawn mowers or Power Ups.
- Required plants:
- Start the level off by planting Gold Bloom and a couple of Sunflowers. This gives you sun faster.
- Use Snapdragon to take out the first few zombies.
- At the first flag, you should have a full column of Snapdragons + some Primal Wall-nuts.
- When the T. Rex comes and speeds up zombies, use Cherry Bomb or Magnifying Grass to kill the sped up zombies.
- Use Cherry Bomb or Magnifying Grass to quickly kill the Octo Zombies. If you do not kill them quickly enough, the level will get harder because of the more octopi.
- Right after Gold Bloom is recharged, you should use it.
- At the end, when the Jurassic Gargantuar appears, you should have lots of sun. Use your sun on Magnifying Grass and shoot it ten times to take out the Jurassic Gargantuar. Alternatively, Cherry Bomb could also work, but the recharge is slow and it takes three Cherry Bombs to take out the Jurassic Gargantuar. If you want to do it the Cherry Bomb way, just try stalling the Gargantuar by putting Primal Wall-nuts.
Gallery

Tenth step in Rescue the Gold Bloom, using the first strategy above.
- Plants vs. Zombies 2 - Epic Quest Rescure the Gold Bloom! - Stage 10

Videos
- Plants vs. Zombies 2 GOLD BLOOM - Epic Quest Premium Seeds (Ep.314)
By Alex5432000
In other languages
Please note that only official translations are used.
| Language | Name | Description |
|---|---|---|
| Rescue the Gold Bloom | ||
| Sauvez le phosflorescent | ||
| Rette die Goldblüte | ||
| Salva il fiore d'oro | ||
| Broto Dourado | ||
| Rescata a Florecimiento dorado |
- *: Removed ~: Epic Quest
- Archived
- Modern Day
- Modern Day levels
- Levels
- Plants vs. Zombies 2
- Plants vs. Zombies 2 levels
- Neon Mixtape Tour
- Neon Mixtape Tour levels
- Frostbite Caves
- Frostbite Caves levels
- Player's House
- Player's House levels
- Dark Ages
- Dark Ages levels
- Pirate Seas
- Pirate Seas levels
- Lost City
- Lost City levels
- Jurassic Marsh
- Jurassic Marsh levels
- Epic Quests
- Levels where Treasure Yeti never appears
- Conveyor-belt levels