Big Wave Beach - Day 2
- For the Chinese version of the level, see Big Wave Beach - Day 2 (Chinese version).
- For the Chinese version of this level before the v1.8 update, see Big Wave Beach - Day 2 (Chinese version: pre-1.8).
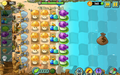
Big Wave Beach - Day 2 is the second level of Big Wave Beach in Plants vs. Zombies 2. Bikini Zombie and her variants, the Bikini Conehead and the Bikini Buckethead, are introduced here. In this level, tides will change for the first time. Additionally, the tideline is located between the third and fourth column. After completing this level, the player receives a money bag.
Dialogue
(Crazy Dave and Penny appear)
Penny: User Dave, data suggests that we should beware the tides.
Crazy Dave: When the tide comes in, it'll be a WIPE OUT for our plant friends?
Penny: Indeed. But the tide line indicates how high the water will rise. Plan accordingly.
Crazy Dave: The tide comes in, the tide goes out. Who can explain it?
Penny: That would be science, User Dave.
(Crazy Dave and Penny leave)
Difficulty
- In this level, there are two types of normal Zombies, along with their Conehead and Buckethead variants - Pompadour Zombies and Bikini Zombies.
- Since Bikini Zombies and Pompadour Zombies usually come in pairs, therefore when compared to other levels from other worlds, twice as many zombies arrive.
- Due to the aforementioned reason, high quantities of Buckethead Zombies are present in this level, which may cause the level to be hard for some direct damage strategies.
- This level starts without water, but then, tides come and water rises. Be sure to plant Lily Pads on right side of the tide line.
- Unlike most levels, this level has three flags, greatly raising the difficulty.
- Only one Plant Food is given in the entire level. When evaluated with three flags and twice the quantity of zombies, it may become a rather challenging level. You may want to grab some powerful plants, such as Melon-pult. Do not rely on simply attacking plants. You may want to grab some defensive plants as well, Infi-nut is a decent choice, especially with the one Plant Food.
Waves
- The small number next to the zombie icon means that zombie will always appear in that lane, with 1 being the topmost lane and 5 being the bottommost lane.
| Waves | Non-dynamic zombies | Ambush zombies | Tide level | Note(s) |
|---|---|---|---|---|
| 1 | None | 0
|
||
| 2 | None | 2
|
||
| 3 | None | 2
|
||
| 4 | None | 2
|
Carries 1x Plant Food. | |
| 5 | None | 4
|
First flag. | |
| 6 | None | 4
|
||
| 7 | None | 4
|
Carries 1x Plant Food. | |
| 8 | None | 6
|
||
| 9 | None | 6
|
||
| 10 | None | 6
|
Second flag. | |
| 11 | None | 6
|
Carries 1x Plant Food. | |
| 12 | None | 6
|
||
| 13 | None | 6
|
||
| 14 | None | 6
|
Carries 1x Plant Food. | |
| 15 | None | 6
|
Final wave. |
Strategies

- Created by Sinanco
- Required plants:


- Suggested plants:


This strategy involves the usage of only peashooting plants as offensive and defensive plants, Magnet-shrooms as utility plants and Twin Sunflowers for sun production purposes. If you have the extra seed slot upgrade, usage of a cheap single use plant is suggested, especially Potato Mine or Squash. When the level begins, you should focus on planting as many Twin Sunflowers as possible on the second lane, until the first zombie closes in. Snow Peas should be planted rapidly to the first column before the first wave comes in order to slow down all incoming zombies. Note that a Snow Pea can handle normal zombies and Conehead Zombies all by itself. As you acquire money to do so, you should plant Twin Sunflowers on the first, third and fifth tiles of the third column. The first Buckethead Zombie will arrive early, so when the first flag is reached, you should have at least one Magnet-shroom on the sixth column, a Pea-nut in front of it to defend it and preferably a Repeater on either the fourth or fifth column to ease the pressure in front of the Pea-nut. At this stage, you can either strengthen individual lanes by planting Repeaters or planting Threepeaters on the second and fourth tiles of the third column to increase the firepower in every lane. You should be quick to build up as much Magnet-shrooms as possible to the sixth column as the level is quick to send high concentrations of Buckethead Zombies. You should back-up the Magnet-shrooms with Pea-nuts and Repeaters. If the zombies manage to breach the defenses in one lane, the single-use plant can be used to get rid of them. If too many Buckethead Zombies come before the defenses are ready, you can use the one Plant Food given earlier in the level on a Magnet-shrooms to remove all buckets. When there are enough Magnet-shrooms and Repeaters, the plants become sustainably competent by themselves to stop upcoming zombies. At this point you should work on completing the Repeater columns and replacing/first aiding Pea-nuts. When the set-up is complete, the level can be beaten easily.
Gallery
Strategy using Sun-shrooms, Bowling Bulbs, Lily Pads, and Fume-shrooms
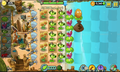
By Matcha333
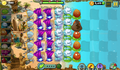
Done by Satirelol200
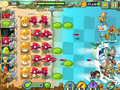
By Someone456


Walkthroughs
- Big Wave Beach Day 2
- Plants vs. Zombies 2 Strawburst Shadow Peashooter - Big Wave Beach Day 2 (Ep.387)
By Alex5432000
- *: Removed ~: Epic Quest
<poll> How would you rate Big Wave Beach - Day 2's difficulty? Very hard Hard Somewhat hard Medium Somewhat easy Easy Very easy </poll>