Jurassic Marsh - Day 9
Jurassic Marsh - Day 9 is the ninth level of Jurassic Marsh in Plants vs. Zombies 2. It is a Locked and Loaded level. Pterodactyls make their first appearance here. After completing this level, the player receives a money bag.
Dialogue
(Crazy Dave appears)
Crazy Dave: Penny! I just remembered how much I love silent letters!
(Penny appears)
Penny: Coincidentally, User Dave, a flock of Pterodactyls is approaching.
Crazy Dave: Pterodactyls? That's ptotally pterrific!
(Crazy Dave and Penny leave)
Difficulty
The pterodactyl is possibly the hardest dinosaur to deal with, especially in this level. Pterodactyls bring a Jurassic Zombie, Conehead, Buckethead, or Fossilhead to the first column, switching their direction and making the zombies act like the Prospector Zombie; however, Prospector Zombies differs greatly from these backwards zombies because the player cannot use Blover to blow them away, which means once a zombie is taken, it is guaranteed to bring it to the closest column to the house. The zombie walks away from the house, but can still be killed, unlike zombies walking away from the house affected by Hypno-shroom. Plus, many pterodactyls are present, mostly two at a time, so Perfume-shroom cannot be used to affect all of them. The only offensive plants are Primal Peashooter and Potato Mine, which makes this level a bit more trickier. It is suggested to use Instant Recharge on Perfume-shroom.
Waves
- The small number next to the zombie icon means that zombie will always appear in that lane, with 1 being the topmost lane and 5 being the bottommost lane.
| Waves | Non-dynamic zombies | Ambush zombies | Dinosaurs | Note(s) |
|---|---|---|---|---|
| 1 | None | None | ||
| 2 | None | None | ||
| 3 | None | None | Carries 1x Plant Food. | |
| 4 | None | First flag. | ||
| 5 | None | None | ||
| 6 | None | Carries 1x Plant Food. | ||
| 7 | None | None | ||
| 8 | None | Second flag. | ||
| 9 | None | None | Carries 1x Plant Food. | |
| 10 | None | |||
| 11 | None | None | ||
| 12 | None | Final wave. |
Strategies
Strategy 1
- Created by Birdpool
- Take out the first few zombies with Potato Mines.
- Place the Primal Wall-nuts in the ninth column to stop dinosaurs from interacting with zombies.
- You will want two columns of Sun-shrooms, assuming yours is at a low level (less than four).
- If a pterodactyl picks up a zombie (or any Dino-Zombie interaction happens), just Perfume-shroom it.
- If this fails and a zombie starts eating one of your Sun-shrooms, immediately dig it up (for the sun refund) and replace it with a Primal Peashooter. Once the zombie begins eating the next Sun-shroom, the Primal Peashooter will (eventually) knock the zombie "back", throwing it into a more vulnerable position, eventually landing it in a place where the other plants can possibly kill it.
- Once you take care of that, if that happens, then replace the Sun-shroom as soon as you can.
- If this fails and a zombie starts eating one of your Sun-shrooms, immediately dig it up (for the sun refund) and replace it with a Primal Peashooter. Once the zombie begins eating the next Sun-shroom, the Primal Peashooter will (eventually) knock the zombie "back", throwing it into a more vulnerable position, eventually landing it in a place where the other plants can possibly kill it.
- Later into the level you may want to start replacing your second Sun-shroom column with Primal Peashooters.
Gallery
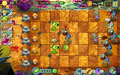
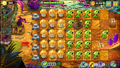
First flag by Electric Plants
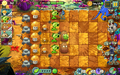
Second flag by Electric Plants
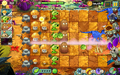
Third flag by Electric Plants
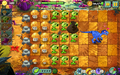
Done by Electric Plants
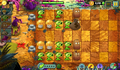
By MyNameIsMyName. Note: I used Primal Wall-nut at the first column from the right in order to keep zombies away from dinosaurs.
By Satirelol200
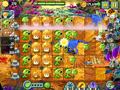
By Someone456

By Astephen542


Walkthroughs
- Plants Vs Zombies 2 Jurassic Marsh Day 9
- Jurassic Marsh Day 9
- Plants vs. Zombies 2 New Dinosaur Pterodactyl - Jurassic Marsh Day 9 (Ep.302)
By Alex5432000
- *: Removed ~: Epic Quest
<poll> How would you rate Jurassic Marsh - Day 9's difficulty? Very hard Hard Somewhat hard Medium Somewhat easy Easy Very easy </poll>