Lost City - Day 3
- For the Chinese version of the level, see Lost City - Day 3 (Chinese version).
Lost City - Day 3 is the third level of Lost City in Plants vs. Zombies 2. It is a Special Delivery level. Lava Guava, the gem premium plant tied to Lost City Part 1, is showcased in this level. There are no Gold Tiles on the lawn, as it is a conveyor-belt level and there is no sun. After completing this level, the player receives a money bag.
Dialogue (intro)
(Crazy Dave and Penny appear)
Penny: We are facing considerable threats, User Dave. I suggest that we retaliate with tremendous force.
Crazy Dave: More forceful! That's it! We'll give them all a stern talking to.
Penny: I was referring to the Lava Guava. Its explosive blasts leave behind dangerous magma.
Crazy Dave: That sounds even better! First a stern talking, then some lava!
(Crazy Dave and Penny leave)
Difficulty
- The large amount of zombies in this level is perfect for utilizing Lava Guava's lava tiles.
- Red Stinger's lack of an area of effect makes its attacks less useful for this zombie-packed level, but its defensive abilities and, when used at the right moment, Plant Food effect make it equally as important as Lava Guava.
- While it is usually redundant in normal levels, Lava Guava's Plant Food effect proves to be useful here. Its long duration is great for stalling zombies and finishing off Buckethead Zombies with lava pools after the effect wears off.
Conveyor-belt plants
Initial
| Plants | Chance (%) | Max Count |
|---|---|---|
| 100% | Infinite |
Wave 1
| Plants | Chance (%) | Max Count |
|---|---|---|
| 75% | Infinite | |
Waves
- The small number next to the zombie icon means that zombie will always appear in that lane, with 1 being the topmost lane and 5 being the bottommost lane.
| Waves | Non-dynamic zombies | Ambush zombies | Note(s) |
|---|---|---|---|
| 1 | None | ||
| 2 | None | ||
| 3 | None | Carries 1x Plant Food. | |
| 4 | None | Carries 1x Plant Food. | |
| 5 | None | First flag. | |
| 6 | None | Carries 1x Plant Food. | |
| 7 | None | ||
| 8 | None | Carries 1x Plant Food. | |
| 9 | None | ||
| 10 | None | Second flag. Carries 1x Plant Food. | |
| 11 | None | Carries 4x Plant Food. | |
| 12 | None | ||
| 13 | None | Carries 1x Plant Food. | |
| 14 | None | ||
| 15 | None | Final wave. |
Strategies
Plant Red Stingers from Column 1-3 since they can use their full power to defeat zombies, use Lava Guava to easily kill zombies in a 3 by 3 area. Use Plant Food on either plant since they both can easily harm zombies in their lanes.
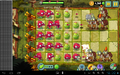
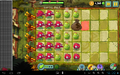
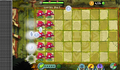
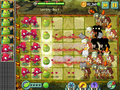
Gallery
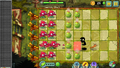
Two columns of Red Stingers in this game screenshot
By Pinkgirl234

By Pinkgirl234
By Pinkgirl234
By Pinkgirl234
By Pinkgirl234
Level completed by Pinkgirl234
By Satirelol200
By Someone456


_-_1.png)
_-_2.png)
_-_3.png)
_-_4.png)
_-_5.png)
_-_6.png)


Walkthrough
- Lost City Day 3
- Plants vs Zombies 2 - Lost City Day 3 - Lava Guava
- Plants vs. Zombies 2 Lava Guava and Red Stinger - Lost City Day 3 (Ep.201)
By Alex5432000
- *: Removed ~: Epic Quest
<poll> How would you rate Lost City - Day 3's difficulty? Very hard Hard Somewhat hard Medium Somewhat easy Easy Very easy </poll>